Monday, October 12, 2009
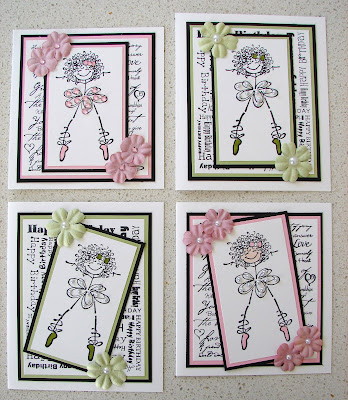
Ballerina Cards
Sunday, October 11, 2009
Twins' 16th birthday.
Saturday, October 10, 2009
Christmas Card Class WIth Friends
The second card has a line of sparkly snow, thanks to Dazzling Diamonds glitter, and a neat torn edge with compliments of the Tearing Edge ruler...
The background of the third card was created with the Soft Holly wheel, and the doves, again, were sprinkled with Dazzling Diamonds...
Tuesday, September 29, 2009
Petal Pizzaz Card and Gift Bag
Here is a gift bag & card that I made for my Mum's birthday next month...
It's OK. she doesn't read my Blog - ha ha!
For these projects I used the Petal Pizzaz stamp set teamed with the now retired Brocade Background papers (I'm pretty sure that's the name of it but feel free to correct me if I'm wrong). Colours used were the also obsolete River Rock & Chocolate Chip. Tools & accessories used were circle punches, scallop circle punch, oval punches, gold brads, Chocolate Chip ribbon & twine. The sentiment is from Wonderful Favourites set.
Things have been quiet on the Blogging front as I've been slowly working on the girls birthday invitations for nest year, and coming up with Christmas cards for a class I'm doing next next week. I have almost prepared the kits so I've feeling very productive.
Well, I'm off. Hope to be in bed early tonight. Enjoy your night.
Andrea.
Saturday, September 19, 2009
Wedding Card Class
I love the elegance of the For the Bride stamp set, which we teamed with Whisper White, Pretty in Pink & Basic Black. The flowers from the One of a Kind stamp set have been punched out with the matching Boho Blossoms punch, popped up on dimensionals & little rhinestones adhered to their centres.
This was the second card of the night...
Again, we used the For the Bride and One of a Kind stamp sets, but this time with the soft colour combination of Whisper White, Sahara Sand & Pretty in Pink. This time the main image was stamped onto the Whisper White cardstock & then stamped again on a separate piece, cut out & popped up on dimensionals. The sentiment is from the now retired hostess set, So Many Sayings, & was punched out with the Window punch.
As usual, we had a great time crafting, chatting & eating last night.
I'll try to be back soon , but I'm currently working on invitations for the girls' party, which yes, I know is not until March next year, but's that's just me. I have a great idea & I'm striking while the iron's hot!
Well, bye for now & enjoy this great weekend weather.
Andrea.
Friday, September 18, 2009
Demi's Preschool Photo Layout
The colours of the photo were a little difficult to work with but I think I got there in the end by pulling out the now obsolete Ginger Blossom DSP, cardstock and ink, & combining it with Elegant Eggplant cardstock, ink & ribbon, & Old Olive ink.
I used the gorgeous Petal Pizzaz stamp set, clear rhinestones, a little pewter plaque.
I also completed the layout of the class photo but as with Mia's school photo layout, I haven't posted it for privacy reasons.
Well, I'm holding a class tonight so I hope to be back over the weekend to post photos of tonight's creations.
Until then.
Andrea.
Friday, September 4, 2009
Father's Day Fishies
It was my first attempt using this Just Beachy set from the Spring Mini Catalogue & it was a lot of fun.
Thursday, September 3, 2009
Can't get enough of the "Family"
First up are two cards very similar to the ones in my previous post...
...and secondly is the Father's Day card I made for my hubby...
I know the girls will make their own cards for their Dad, but I just wanted to make one for him too. I just LOVE making these cards! They look so cute!
I won't list all the supplies, but if you want any information in relation to the cards, please feel free to ask.
Bye for now.
Andrea.
Monday, August 31, 2009
More All in the Family
Supplies used:
Stamps: All in the Family, Best Yet (hostess set), Think Happy Thoughts, non-SU number stamp sets.
Cardstock: Very Vanilla, Chocolate Chip, Pretty in Pink, Bashful Blue, watercolour paper.
Ink: Black StazOn, Pretty in Pink, Bashful Blue, Chocolate Chip and Blush Blossom markers.
Other: Big Kick with Cuttlebug Embossing Folders, Square punches, Scallop Oval and Large Oval punches, Scallop Circle and Circle punches, pink ribbon.
I think that's it!
Well, thanks for stopping by. I hope to be back soon as I'll have some similar cards to show you once I finish them.
Bye...
Directions for little gift bags.
I have had a few requests for the directions to make the cute little bags I posted last week. Well, here goes...
The bags are made with half a 30 x 30cm inch piece of doublesided scrapbooking paper, so you start with a piece that is 30cm x 15cm.
Hold the piece horizontally & mark lines vertically at 11cm, 14cm, 25cm & 28cm. Then score horizontally at 12cm from the top.
Score all lines, except for the top horizontal line. You will be left with a small rectangle on the bottom, right hand side of the bag. Cut this small rectangle away.
Now cut all vertical lines from the bottom up to the first horizontal line from the bottom. Fold along all the scored lines. Now turn the sheet over and score a horizontal line 3cm from the top. This fold will be the folded over detail on the top of the bag. Am I making sense?
Turn the sheet back to how you started and begin to tape the bag together at the base. Tape the small flaps under the first larger flap and end with the other last flap at the very bottom of the bag. Then place a strip of tape along the thin strip of the bag that is left and tape it to the bag on the inside.
Now all you need to do is punch four holes using the Horizontal Slot Punch for the handles, which are made from 1cm strips of coordinating cardstock. Attach the handles using brads, and make a coordinating tag. Voila!
I hope it all makes sense without photos.
well, good luck & most importantly have fun!
Thursday, August 27, 2009
Today's Class
The second project was one of these cute little handbags...
Friday, August 21, 2009
Another Big Bold Birthday Cupcake Card
Here is a very fun, fresh and young birthday card made for one of Mia's school friends....
I used paper remnants from the Petal Party Simply Scrappin' Kit, (boy, this kits goes a loooong way!) together with Whisper White, Old Olive, Pumpkin Pie and Pink Passion.
Here are some photos of the inside of the card & the matching envelope...
You may remember a similar card that I made recently. Actually, I made it using the exact same layout but in different colours. Here is the link to that card and others made using the Bog Bold Birthday stamp set: http://stampmyday.blogspot.com/search/label/Big%20Bold%20Birthday
Well, thanks for stopping by again. I hope you're enjoying this great weather we've been having. I hear we're in for some more of it this weekend. How lucky are we?
Take care.
Andrea.
Thoughts and Prayers Get Well Card
For this card I used a lovely colour combination of Chocolate Chip, Pretty in Pink, Old Olive & Very Vanilla. I used Stampin' Write markers in Chocolate Chip, Old Olive & Pretty in Pink to colour the image. Stampin' Write markers are fabulous for multi-coloured images. You use them just as you would a texta, directly onto the rubber of a stamp, & stamp your image as you normally would.
I also used little clear crystals & a flower from my stash.
I hope you like it, but more importantly, I hope it inspires you to create something today!
Take care.
Andrea.
Monday, August 3, 2009
Hostess Gift Bag
It turned out so cute & it was so easy & relatively quick to make. I also used circle punches, circles punches & the Horizontal Slot punch, the Best Yet level 1 hostess set, silver brads, Night of Navy and Whisper White cardstock, Night of Navy ink.
Wanna know what was in it? Some little Lindt chocolates in white tissue paper.
Well, that's all from me today. I hope you all have a great day & manage to squeeze in some creativity.
Take care,
Andrea