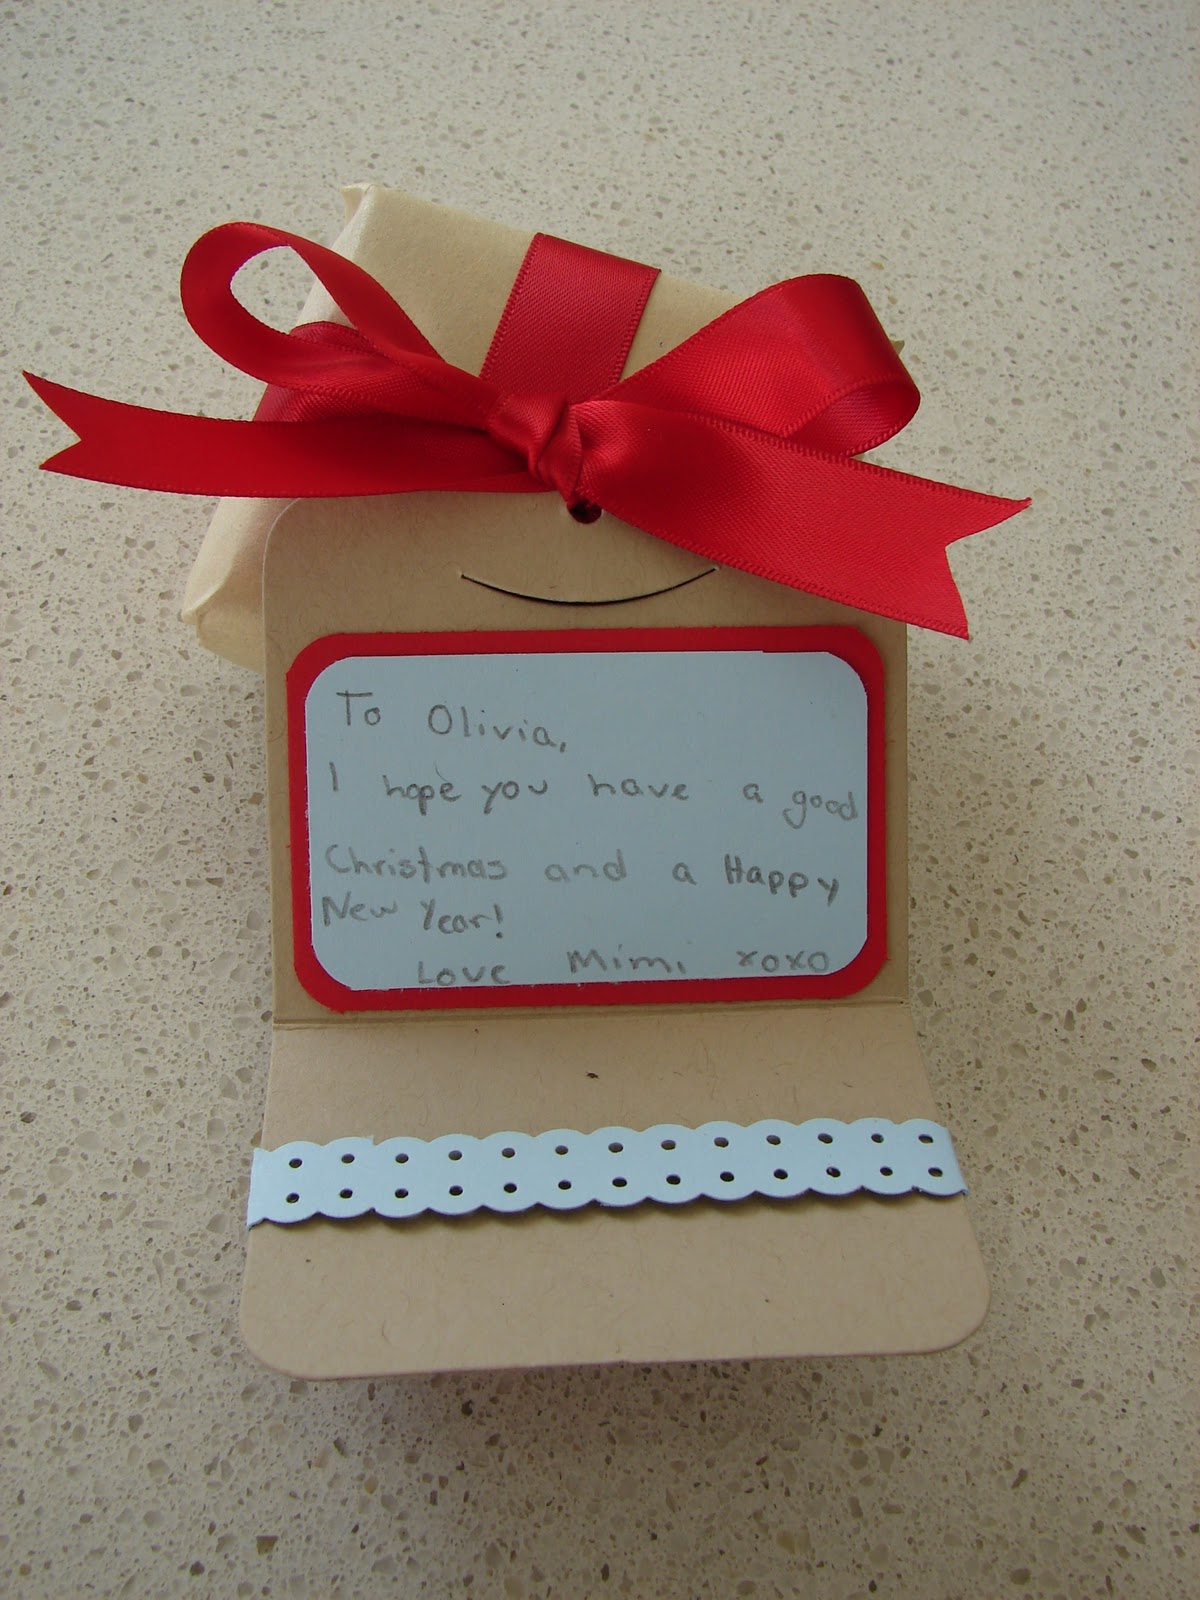
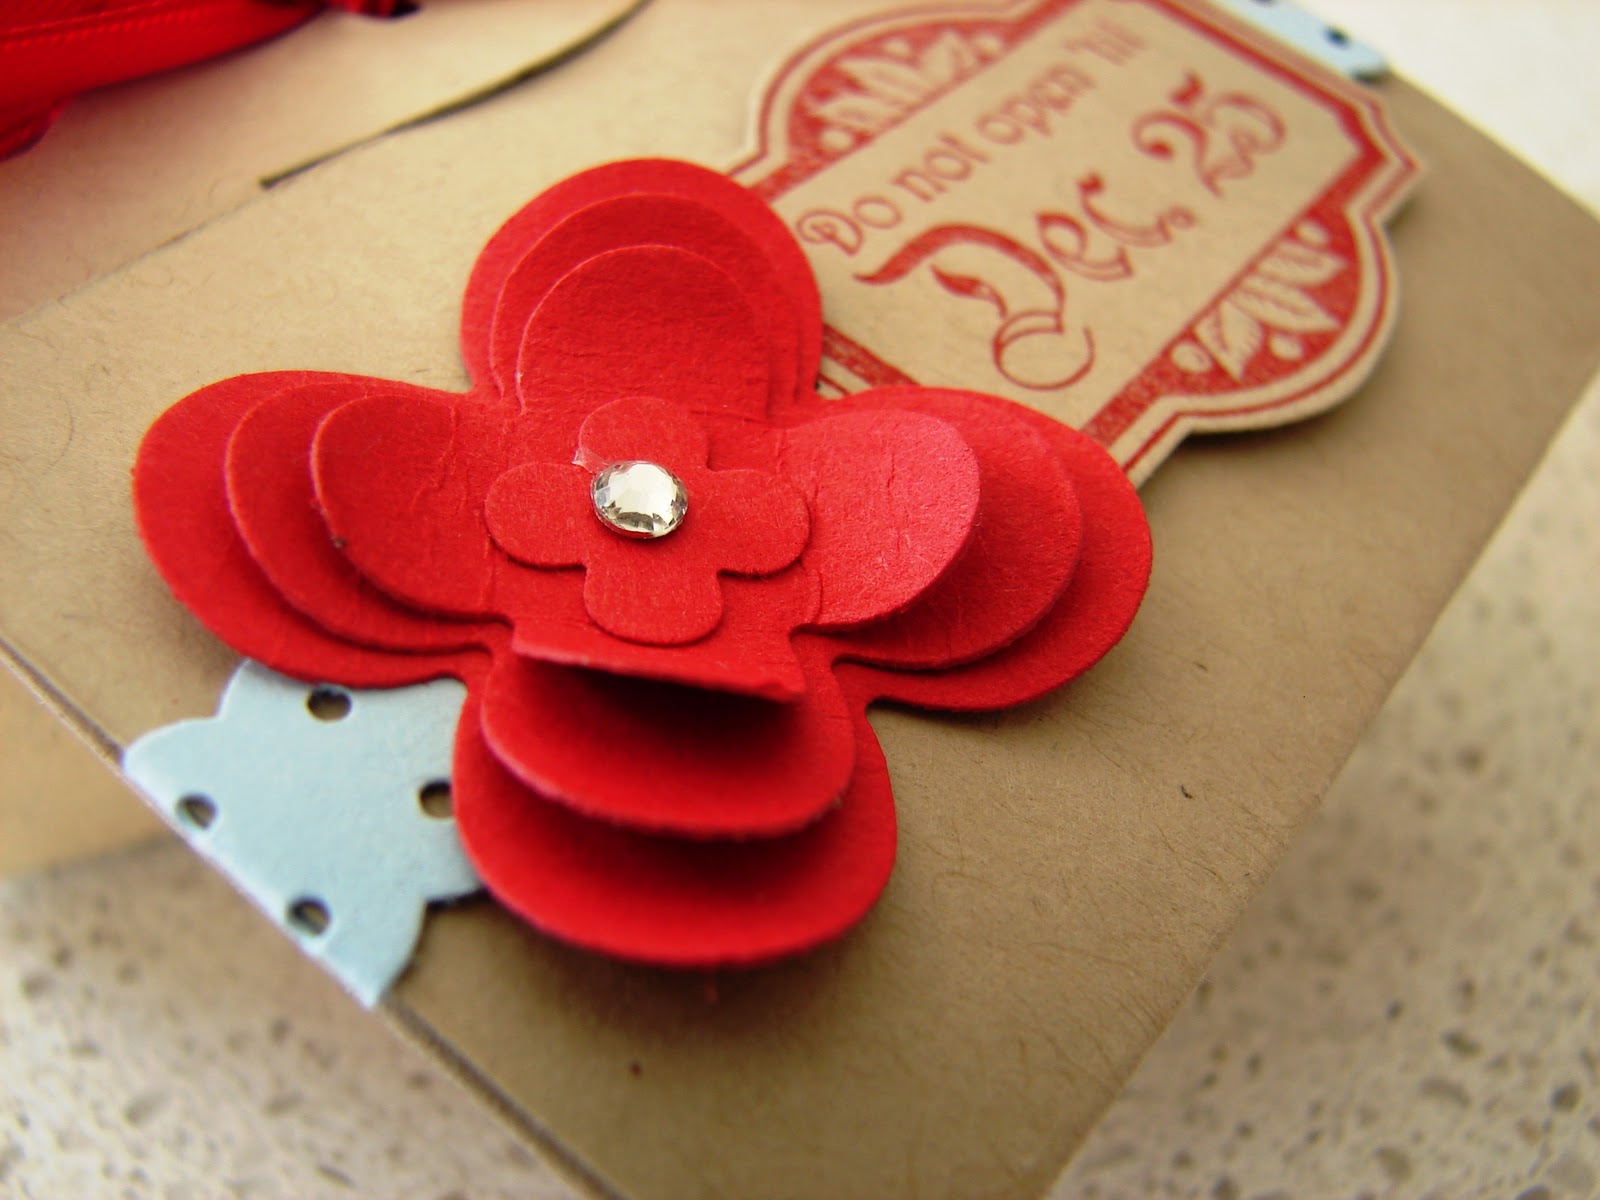
Woo hoo! I have my first ever Fancy Favor Box to show you today! It's very simple because I was in a BIG hurry. Honestly, it took me about five minutes to make. Gotta love that. Well, here it is...
This die has definitely made it onto my list of favourite crafting supplies! Can't wait for the opportunity to use it again.
Off to bed now. It's late and these school holidays are wearing me out. Ha ha... I love school holidays but they are exhausting.
See you soon. Sleep tight.
Andrea
Wednesday, January 11, 2012
Some School Scrapping
I think I promised you another card for my next post but instead, I have scrapbooking pages. I've fallen a little behind with the scrapping so I'm trying to get back into it.
Anyway, first up I have a page of Demi wearing her Winter uniform for the first time. Please don't ask me what 12 x 12 paper I used because I never remember the name, but they are by Stampin' Up! Well, here it is...
The second one is Mia's Year 3 photo. I scrapped the class photo too but for privacy reasons I won't post it. Anyway, here it is...
Anyway, first up I have a page of Demi wearing her Winter uniform for the first time. Please don't ask me what 12 x 12 paper I used because I never remember the name, but they are by Stampin' Up! Well, here it is...
The second one is Mia's Year 3 photo. I scrapped the class photo too but for privacy reasons I won't post it. Anyway, here it is...
This was the first time I used the Letter It stamp set & I can see myself using it time and time again, especially for scrapbooking. I LOVE it but do you know what would make it the perfect stamp set? If it came with a matching punch! That said, the letters were very easy to cut out with scissors.
Well, that's all for this post but I'll be back in a few minutes with another project. Catch you then
Andrea
Keeping With the Same Sketch
Back again!
This time with a card for a little boy who's turning six...
Yes, it's the same layout of used for the last few cards. Very easy and always effective.
The colours this time were Real Red, So Saffron and Night of Navy. The sentiment is from the retired Curly Label Punch Set. The stars were punched with the small star punch and adhered onto squares punched with the large square punch. The image was stamped in Black StazOn ink onto watercolour paper and coloured with SU markers.
That's it for today but I have another card to make for a 1st birthday (how cute) so stay tuned!
See you then.
Andrea :)
This time with a card for a little boy who's turning six...
Yes, it's the same layout of used for the last few cards. Very easy and always effective.
The colours this time were Real Red, So Saffron and Night of Navy. The sentiment is from the retired Curly Label Punch Set. The stars were punched with the small star punch and adhered onto squares punched with the large square punch. The image was stamped in Black StazOn ink onto watercolour paper and coloured with SU markers.
That's it for today but I have another card to make for a 1st birthday (how cute) so stay tuned!
See you then.
Andrea :)
Saturday, January 7, 2012
Niece's Sweet Sixteenth
Hello!
I hope you all enjoyed your Christmas and New Year celebrations, and that it was a special time for you.
It seems like a lifetime ago that I made a card so it felt really good to get back into the swing of things.
And what better occasion to make a card for than our niece's sweet sixteenth coming uo in two weeks...
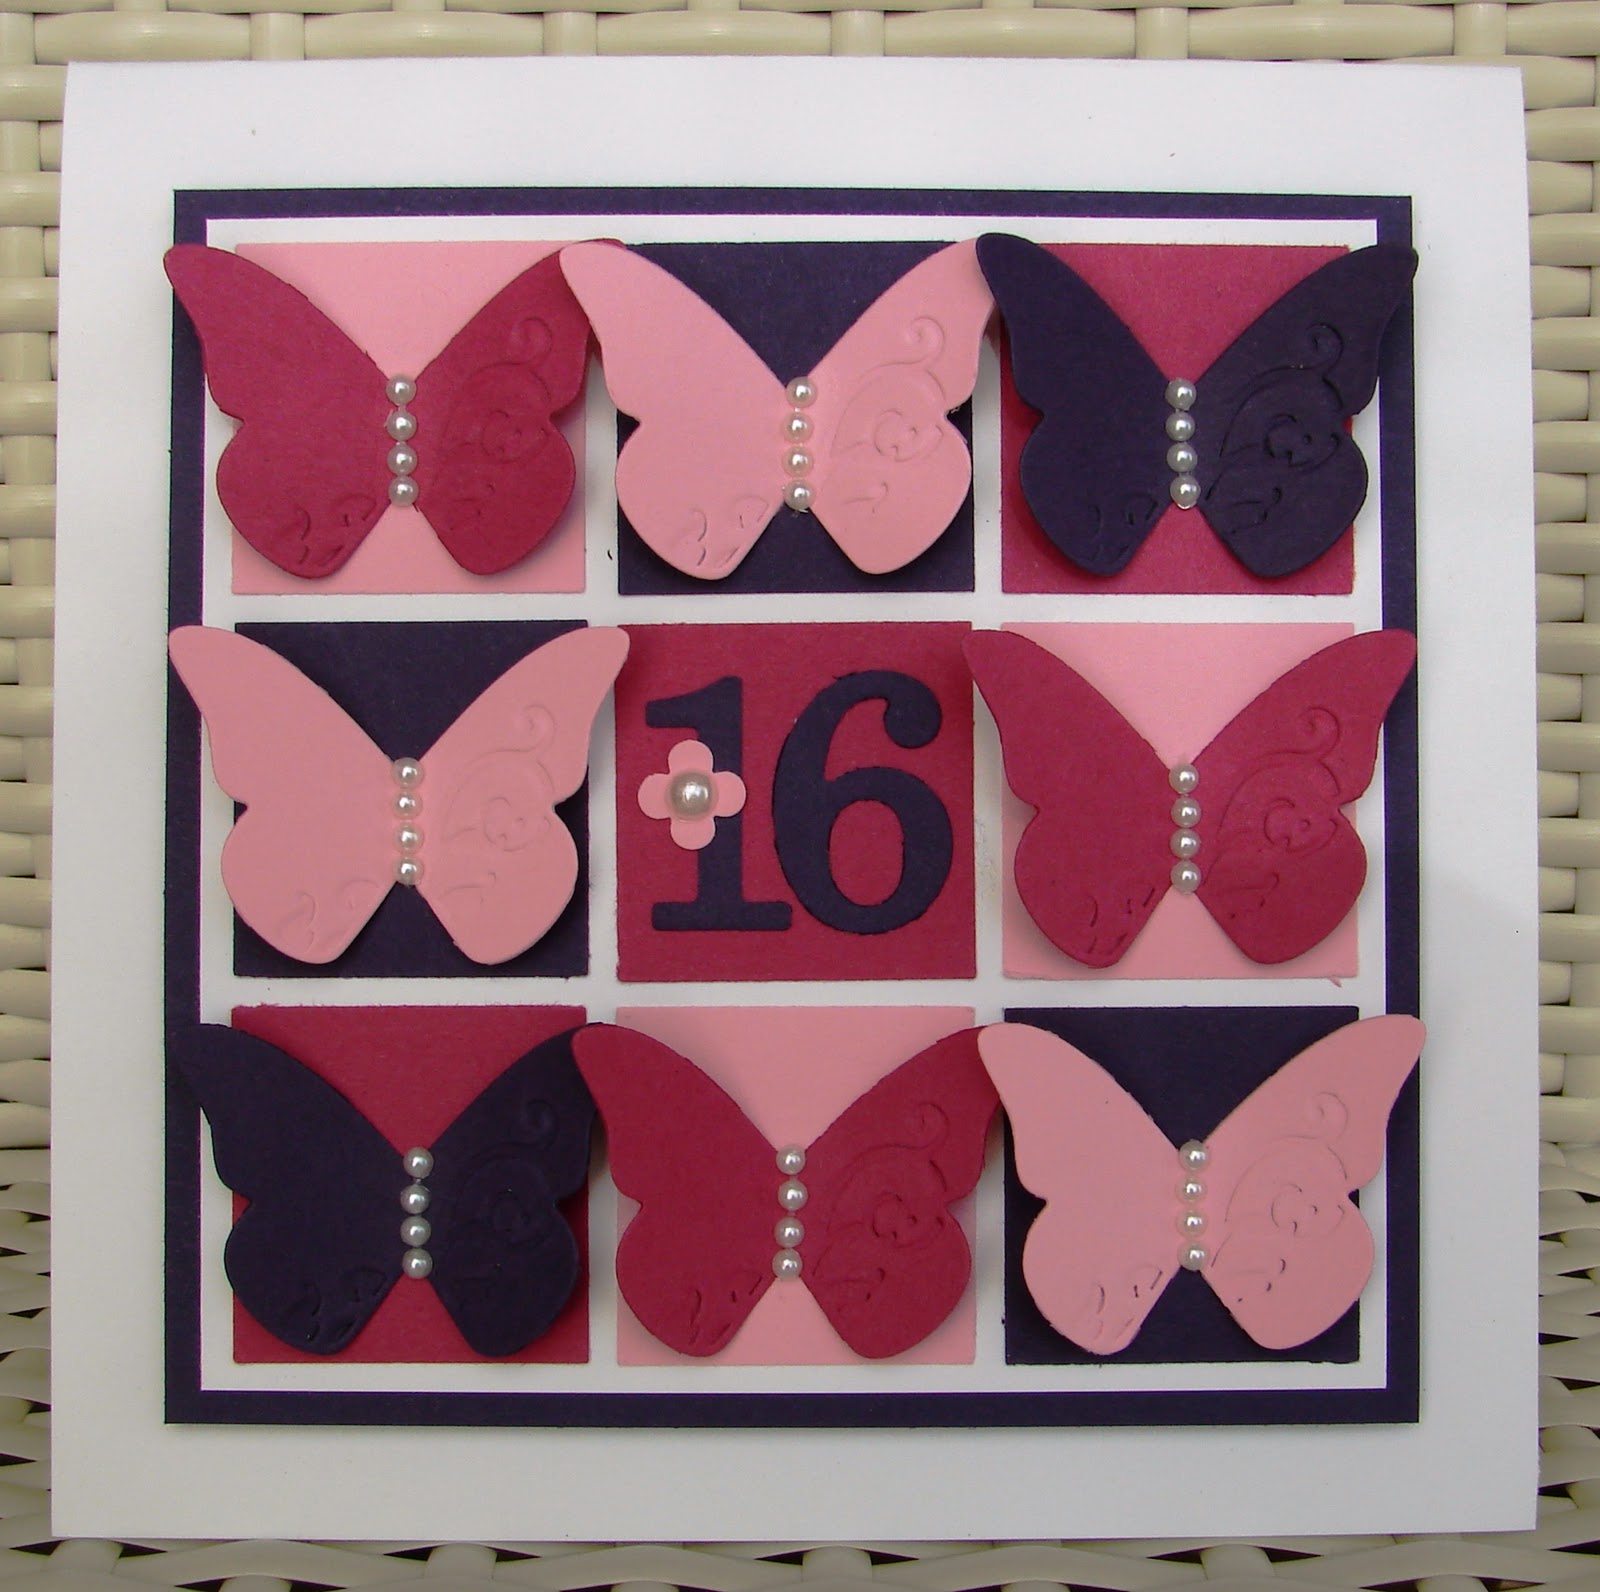
I'm so happy with how it turned out. The colours are really pretty - Rose Red, Elegant Eggplant and Pretty in Pink, and those butterflies cut with the Beautiful Wings die are just amaaaazing! I love that little die and I just love it when you get a good feeling about a card.
The buuerflies were adhered to squares punched with the large square punch, and embellished with adhesive half-pearls. The numbers were cut with the alphabet dies and the little flower was cut with one of the punches from the Itty Bitty Punch Set.
What do you guys think about it? Feel free to leave me a few words just to know someone is out there!!!! Ha ha... Doesn't matter if you don't know me. All the better! :)
Back soon with another post. Promise.
Andrea
I hope you all enjoyed your Christmas and New Year celebrations, and that it was a special time for you.
It seems like a lifetime ago that I made a card so it felt really good to get back into the swing of things.
And what better occasion to make a card for than our niece's sweet sixteenth coming uo in two weeks...
I'm so happy with how it turned out. The colours are really pretty - Rose Red, Elegant Eggplant and Pretty in Pink, and those butterflies cut with the Beautiful Wings die are just amaaaazing! I love that little die and I just love it when you get a good feeling about a card.
The buuerflies were adhered to squares punched with the large square punch, and embellished with adhesive half-pearls. The numbers were cut with the alphabet dies and the little flower was cut with one of the punches from the Itty Bitty Punch Set.
What do you guys think about it? Feel free to leave me a few words just to know someone is out there!!!! Ha ha... Doesn't matter if you don't know me. All the better! :)
Back soon with another post. Promise.
Andrea
Monday, December 19, 2011
A Break From Christmas Cards
That's right. No Christmas cards in this post. Instead, two birthday cards. As much as I enjoyed making my Christmas cards and projects this year, this was a welcome break. Here they are...
This one was for one of Mia's school friends. I used Crumb Cake, Certainly Celery, Garden Green and Chocolate Chip cardstock. The image was coloured with SU markers. The leaves are from the Two-Step Bird Punch. The flowers were stamped with the Vintage Vogue stamp set in Bashful Blue and embellished with half pearls. The sentiment from happiest Birthday Wishes was stamped in Chocolate Chip ink. The 'ribbon' was punched with the Dotted Scallop Ribbon Punch from Chocolate Chip cardstock.
The following card was made for our niece, Victoria...
Without wanting to sound showy, I have to say that this is one of my favourite cards out of all the ones I have ever made, and boy, there have been a few! Maybe it's the colours. Unconventional for me. I wanted to go 'bright' for this card & I just picked some random colours. No real science to it but I love the result.
The colours I picked were Tempting Turquoise, Elegant Eggplant, Real Red and Whisper White. The sentiment in the centre was stamped with the a stamp from the retired Curly Label Punch Bundle.
The punches I used were the square punch, the Owl Punch, the small star punch, the Two Step Bird punch for the leaves, and the little flower punch from the Itty Bitty Punch Pack.
The dies I used were the alphabet dies, Floral Fusion die and the Beautiful Wings die. I used adhesive crystals for embellishment.
I think I remembered everything, but if not, feel free to ask. Even leave a comment, if you like. I don't get many comments :( so the few I do get are very welcome and very appreciated. They put a smile on my face. :)
Well, that's all for today. Who knows, I may be back before Christmas, but if not, I'll take this opportunity to wish you all a wonderful, peaceful and very merry Christmas and a new year that is filled with love and good health.
Enjoy your celebrations but take care and stay safe.
Andrea
This one was for one of Mia's school friends. I used Crumb Cake, Certainly Celery, Garden Green and Chocolate Chip cardstock. The image was coloured with SU markers. The leaves are from the Two-Step Bird Punch. The flowers were stamped with the Vintage Vogue stamp set in Bashful Blue and embellished with half pearls. The sentiment from happiest Birthday Wishes was stamped in Chocolate Chip ink. The 'ribbon' was punched with the Dotted Scallop Ribbon Punch from Chocolate Chip cardstock.
The following card was made for our niece, Victoria...
Without wanting to sound showy, I have to say that this is one of my favourite cards out of all the ones I have ever made, and boy, there have been a few! Maybe it's the colours. Unconventional for me. I wanted to go 'bright' for this card & I just picked some random colours. No real science to it but I love the result.
The colours I picked were Tempting Turquoise, Elegant Eggplant, Real Red and Whisper White. The sentiment in the centre was stamped with the a stamp from the retired Curly Label Punch Bundle.
The punches I used were the square punch, the Owl Punch, the small star punch, the Two Step Bird punch for the leaves, and the little flower punch from the Itty Bitty Punch Pack.
The dies I used were the alphabet dies, Floral Fusion die and the Beautiful Wings die. I used adhesive crystals for embellishment.
I think I remembered everything, but if not, feel free to ask. Even leave a comment, if you like. I don't get many comments :( so the few I do get are very welcome and very appreciated. They put a smile on my face. :)
Well, that's all for today. Who knows, I may be back before Christmas, but if not, I'll take this opportunity to wish you all a wonderful, peaceful and very merry Christmas and a new year that is filled with love and good health.
Enjoy your celebrations but take care and stay safe.
Andrea
Saturday, December 17, 2011
More Chrissy Cards
Hi everyone and welcome to the school holidays! Welcome to no-rush mornings, staying in PJ's all morning, no more school lunches and welcome to no more homework. Aahhhh....
I managed to get some more Christmas cards done today. I think this should be the last of them for this year. :(
Here they are...
For this first card I used the Lovely As A Tree, Welcome Christmas and Teeny Tiny Sentiments stamp sets with a sponged background and lots of Dazzling Diamonds.
For the last card I used the tree from Lovely As A Tree, stamped in Craft White ink onto Crumb Cake cardstock and heat embossed with white embossing powder. The greeting is also from Many Merry Messages. I made the the holly with the leaves from the Two Step Bird punch and some red half-pearls.
Which one do you like the best?
Andrea
I managed to get some more Christmas cards done today. I think this should be the last of them for this year. :(
Here they are...
For this first card I used the Lovely As A Tree, Welcome Christmas and Teeny Tiny Sentiments stamp sets with a sponged background and lots of Dazzling Diamonds.
For the second card I used a stamp form the Merry and Type set stamped in Real Red and accented with red ribbon and Dazzling diamonds. The sentiment is from Many Merry Messages.
For the last card I used the tree from Lovely As A Tree, stamped in Craft White ink onto Crumb Cake cardstock and heat embossed with white embossing powder. The greeting is also from Many Merry Messages. I made the the holly with the leaves from the Two Step Bird punch and some red half-pearls.
Which one do you like the best?
Andrea
Sunday, December 11, 2011
Christmas Gift Giving
Hi again.
I just thought I'd share some of my gift giving/wrapping ideas with you today. Here are photos of the presents I have already bought and wrapped. Yeah me! Ha ha...
Can you tell that I just love using brown paper and brown paper bags? You can team any colours with brown paper and it always looks fantastic. It matches Crumb Cake cardstock nicely, which is what I used for the tags.
I think I mentioned in my last post just how much I'm loving my new Two Tags Die, but I just have to tell you again - I looooove it! I love how the folded tags turned out. I embellished them with a an image from the Winter Post stamp set and a Real Red flower made with the Floral Fusion die and one of the punches from the Itty Bitty Punch Pack.
Oh, gosh. Let me not forget to mention that gorgeous Dotted Scallop Ribbon Punch. Wow! How cute is this punch? It punches out strips of cardstock that look just like ribbon!!! Looooove it too!
The actual ribbon I used to wrap these presents is the satin ribbon in Real Red.
What so you think?
Please feel free to leave a comment. I don't get many comments :( so the few I do get make me very happy :)
Enjoy your crafting!
Andrea
I just thought I'd share some of my gift giving/wrapping ideas with you today. Here are photos of the presents I have already bought and wrapped. Yeah me! Ha ha...
Can you tell that I just love using brown paper and brown paper bags? You can team any colours with brown paper and it always looks fantastic. It matches Crumb Cake cardstock nicely, which is what I used for the tags.
I think I mentioned in my last post just how much I'm loving my new Two Tags Die, but I just have to tell you again - I looooove it! I love how the folded tags turned out. I embellished them with a an image from the Winter Post stamp set and a Real Red flower made with the Floral Fusion die and one of the punches from the Itty Bitty Punch Pack.
Oh, gosh. Let me not forget to mention that gorgeous Dotted Scallop Ribbon Punch. Wow! How cute is this punch? It punches out strips of cardstock that look just like ribbon!!! Looooove it too!
The actual ribbon I used to wrap these presents is the satin ribbon in Real Red.
What so you think?
Please feel free to leave a comment. I don't get many comments :( so the few I do get make me very happy :)
Enjoy your crafting!
Andrea
Christmas Bookmarks
Hello again!
I'm glad to report that I'm steadily getting through my very long Christmas 'to do' list. I set aside time last night to make little gifts for the girls' classmates. They have been receiving lots of cards and candy canes from their friends, which is lovely, but always being one for being different, I didn't want to give the same thing in return.
I decided on making Christmas bookmarks, so with the girls' approval I proceeded to think of a design. There were two things I knew for sure - they design had to be quick and easy to mass produce (I had to make almost sixty!), and I just had to use my new Two Tags die!
So here is what I came up with...
I used Crumb Cake and Very Vanilla cardstock, red ribbon, and Basic Black and Real Red ink.
The stamped reindeer is from the Winter Post set. The sentiments are from Many Merry Messages.
I have to say that I'm really loving the Two Tags die!
Well, I hope the kids love them. I know my girls can't wait to hand them out on Monday!
I'll be back soon with some other little Christmas projects so be sure to keep checking back here.
Take care,
Andrea
I'm glad to report that I'm steadily getting through my very long Christmas 'to do' list. I set aside time last night to make little gifts for the girls' classmates. They have been receiving lots of cards and candy canes from their friends, which is lovely, but always being one for being different, I didn't want to give the same thing in return.
I decided on making Christmas bookmarks, so with the girls' approval I proceeded to think of a design. There were two things I knew for sure - they design had to be quick and easy to mass produce (I had to make almost sixty!), and I just had to use my new Two Tags die!
So here is what I came up with...
I used Crumb Cake and Very Vanilla cardstock, red ribbon, and Basic Black and Real Red ink.
The stamped reindeer is from the Winter Post set. The sentiments are from Many Merry Messages.
I have to say that I'm really loving the Two Tags die!
Well, I hope the kids love them. I know my girls can't wait to hand them out on Monday!
I'll be back soon with some other little Christmas projects so be sure to keep checking back here.
Take care,
Andrea
Thursday, December 8, 2011
Lots of Delightful Decorations
Hello everyone.
Wow! Can you believe there are just two weeks left until Christmas? Yikes! I really have to get a move on those Christmas presents tomorrow. There have been so many things to do lately that I just haven't had the time.
These projects were one of the 'so many things to do.' These are some other Christmas cards that I made for our friends and neighbours...
The prerequisite for making my cards was that they had to be quick to make, and they were, except for the fact that I had to clean my stamp after every image that I stamped because of the rocking 'n' rolling. There are no layers! I rarely make cards without any layering! And they really stand out in real life. I was really happy with how they turned out and how quicly I was able to get them all done. These photos only show a selection of the total of cards I made. There were plenty more.
The gorgeous ornaments are from the Delightful Decorations set and the sentiment is my favourite from the So Many Merry Messages set. Each ornament has either half pearls or clear crystals on them.
I plan to make a few more Christmas projects yet. I just hope I find the time. Wish me luck!
Andrea
Wow! Can you believe there are just two weeks left until Christmas? Yikes! I really have to get a move on those Christmas presents tomorrow. There have been so many things to do lately that I just haven't had the time.
These projects were one of the 'so many things to do.' These are some other Christmas cards that I made for our friends and neighbours...
The prerequisite for making my cards was that they had to be quick to make, and they were, except for the fact that I had to clean my stamp after every image that I stamped because of the rocking 'n' rolling. There are no layers! I rarely make cards without any layering! And they really stand out in real life. I was really happy with how they turned out and how quicly I was able to get them all done. These photos only show a selection of the total of cards I made. There were plenty more.
The gorgeous ornaments are from the Delightful Decorations set and the sentiment is my favourite from the So Many Merry Messages set. Each ornament has either half pearls or clear crystals on them.
I plan to make a few more Christmas projects yet. I just hope I find the time. Wish me luck!
Andrea
Saturday, November 26, 2011
Party Time!
Good morning! Listen. What do you hear? I think the rain here in Sydney has finally stopped. Thank goodness.
Another weekend of Kindergarten parties for my Demi this weekend and here are the cards I made for them, using The Greeting Farm stamps stamped onto watercolour paper and coloured with Stampin' Up! markers...
The colour scheme is Night of Navy, Sahara Sand and Certainly Celery. The background of the second card was created with stamps from the Extreme Elements set. The sentiments are from Happiest Birthday Wishes. The stars were punched with both sizes star punches and the charms are from my stash.
What do you think?
Well, take care and enjoy your weekend.
Andrea
Another weekend of Kindergarten parties for my Demi this weekend and here are the cards I made for them, using The Greeting Farm stamps stamped onto watercolour paper and coloured with Stampin' Up! markers...
The colour scheme is Night of Navy, Sahara Sand and Certainly Celery. The background of the second card was created with stamps from the Extreme Elements set. The sentiments are from Happiest Birthday Wishes. The stars were punched with both sizes star punches and the charms are from my stash.
What do you think?
Well, take care and enjoy your weekend.
Andrea
Thursday, November 24, 2011
Hello!
It has been a while, hasn't it? Life has been just soooo busy, as is typical of this time of year, so when it came to my Christmas cards this year I wanted them to be quick and simple.
I came up with two cards, both incorporating the photos of my girls that I took especially to be included in the cards.
This first one is a front door card, complete with a Christmas wreath and the photo and sentiment inside...
The flowers were stamped using the Vintage Vogue set.
Next is the other card I made using some premade silver cardstock cards that were kindly given to me by a friend who used to work at a stationery outlet...
The Real Red belt is adorned with a stamped image from the retired Punches Three set. The inside is the same as the previous card...
There. All done. Now just have to address the envelopes and post them out. It is such a relief to have crossed off another item off my 'to do' list.
I hope to finish some birthday cards in the next couple of days so stay tuned for those.
See y ou soon.
Andrea
It has been a while, hasn't it? Life has been just soooo busy, as is typical of this time of year, so when it came to my Christmas cards this year I wanted them to be quick and simple.
I came up with two cards, both incorporating the photos of my girls that I took especially to be included in the cards.
This first one is a front door card, complete with a Christmas wreath and the photo and sentiment inside...
The flowers were stamped using the Vintage Vogue set.
Next is the other card I made using some premade silver cardstock cards that were kindly given to me by a friend who used to work at a stationery outlet...
The Real Red belt is adorned with a stamped image from the retired Punches Three set. The inside is the same as the previous card...
There. All done. Now just have to address the envelopes and post them out. It is such a relief to have crossed off another item off my 'to do' list.
I hope to finish some birthday cards in the next couple of days so stay tuned for those.
See y ou soon.
Andrea
Wednesday, November 9, 2011
Ugh! Such bad photos.
Hi everyone.
What a scorcher today was, and still is. Thank goodness for air conditioning.
Anyway, I have two cards to share with you tonight but....the photos are terrible! I took them in the dark and the colours look so bad, but I will still show you. Here they are...
Believe it or not, the colours used were Crumb Cake, Basic Black, Whisper Wahite and Groovy Guava. I love Groovy Guava. Such a shame that it is retired.
The image was stamped in black StazOn onto watercolour paper and coloured with SU markers. The sentiment is from Happiest Birthday Wishes. The flowers were from my stash and were accented with little flowers punch with one of the flowers from the Itty Bitty Punch Pack, and a half pearl.
The next card features images from the Up, Up & Away set. The colours used were Basic Grey, Whisper White and Marina Mist. The balloons were inked with Marina Mist ink & then 'rock 'n' rolled' in Basic Grey. The sentiment is from a retired set called Vintage Labels.
The cloud background was created by using a punched scallop circle and sponging with Bashful Blue ink. A really nice effect.
So, what do you think, despite the bad photos? Feel free to let me know.
Well, stay cool (literally). See you soon.
Andrea
What a scorcher today was, and still is. Thank goodness for air conditioning.
Anyway, I have two cards to share with you tonight but....the photos are terrible! I took them in the dark and the colours look so bad, but I will still show you. Here they are...
Believe it or not, the colours used were Crumb Cake, Basic Black, Whisper Wahite and Groovy Guava. I love Groovy Guava. Such a shame that it is retired.
The image was stamped in black StazOn onto watercolour paper and coloured with SU markers. The sentiment is from Happiest Birthday Wishes. The flowers were from my stash and were accented with little flowers punch with one of the flowers from the Itty Bitty Punch Pack, and a half pearl.
The next card features images from the Up, Up & Away set. The colours used were Basic Grey, Whisper White and Marina Mist. The balloons were inked with Marina Mist ink & then 'rock 'n' rolled' in Basic Grey. The sentiment is from a retired set called Vintage Labels.
The cloud background was created by using a punched scallop circle and sponging with Bashful Blue ink. A really nice effect.
So, what do you think, despite the bad photos? Feel free to let me know.
Well, stay cool (literally). See you soon.
Andrea
Sunday, November 6, 2011
Welcome to another glorious Sydney morning! Just beautiful out there today, as it was yesterday.
The girls had a party yesterday & they'll be off to another party later today, not to mention the school disco they went to on Friday night. What a social life!
Here are the cards I made for the parties...
They were both inspired by this card by Jodene at Did I Say That Out Loud?
Colours used were Crumb Cake, Whisper White, Marina Mist and Old Olive. The image was stamped in Black StazOn ink onto watercolour paper, and coloured with SU markers. The sentiments are from Happiest Birthday Wishes. Not sure if you can make it out from the photo but I added some Crystal Effects on the sunglasses for a glassy finish. The rest is pretty self explanatoru but if you'd like to know anything, feel free to ask.
Whatever you're doing today, I hope you have a great day.
See you all soon.
Andrea
The girls had a party yesterday & they'll be off to another party later today, not to mention the school disco they went to on Friday night. What a social life!
Here are the cards I made for the parties...
They were both inspired by this card by Jodene at Did I Say That Out Loud?
Colours used were Crumb Cake, Whisper White, Marina Mist and Old Olive. The image was stamped in Black StazOn ink onto watercolour paper, and coloured with SU markers. The sentiments are from Happiest Birthday Wishes. Not sure if you can make it out from the photo but I added some Crystal Effects on the sunglasses for a glassy finish. The rest is pretty self explanatoru but if you'd like to know anything, feel free to ask.
Whatever you're doing today, I hope you have a great day.
See you all soon.
Andrea
Subscribe to:
Posts (Atom)